Merhabalar, bildiğiniz gibi Arduino firması Intel işlemcili ilk kartı olan Arduino/Genuino 101’i bir süre önce tanıttı.
Ve Intel işlemcili bu kart ülkemize robotistan.com aracılığı ile geldi. Bu kart nedir ne değildir bu yazıda size tanıtmaya çalışacağım, hatta bir kaç da örnek yapacağız.
NOT: Genuino, Arduino.cc tarafından üretilen Arduino kartlarının telif hakkı nedeniyle ABD dışında kullanılan markasıdır. Orijinal üründür. Yani Arduino 101 ile Genuino 101 aslında aynı üründür.
TEKNİK BİLGİLER
Genuino 101, işlem güçlerini üzerinde bulunan 32 bit Intel® Curie™ SoC entegresinden ve x86 (Quark)’dan almaktadır. 32MHz saat sinyaline sahip katta 196kB Flash Hafıza vardır.
Kartın çalışma gerilimi 3.3V’tur, fakat tüm pinler 5V ile uyumlu çalışacak şekilde korumaya sahiptir.
Kart Arduino UNO ile aynı pin dizilimine sahiptir bu yüzden Arduino UNO için geliştirilmiş olan shield’lere uyumludur. Fakat işlemci Intel olduğundan Arduino için yazılmış tüm kütüphaneleri kabul etmemektedir.
Kart Üzerinde 14 adet G/Ç pini(4 tanesi PWM destekli),
6 adet analog giriş bulunmaktadır.
Kart 7-20V arası gerilim ile çalışabilmekte olup, maximum 12V ile çalıştırılması önerilmektedir.
Kart üzerinde dahili olarak bluetooth ve 6-eksenli jiroskop/ivmeölçer bulunmaktadır,
KARTIN PROGRAMLANMASI
Kart Arduino ile aynı şekilde programlanamsına rağmen, Arduino IDE’sinin üzerinde bir ekleme yapılması gerekmektedir.
Arduino IDE’si Üzerine Intel firmware’si kurulumu:
İlk önce kullandığımız Arduino IDE’si 1.6.7 veya üzeri bir ide olmalı. Daha alt versiyonlardaki ide’lerde malesef 101 kartımızı kullanamıyoruz.
Arduino IDE’mizin sürümünü bilmiyorsak boş bir arduino sayfası açarak durum çubuğuna bakabiliriz.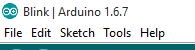
Daha sonra Tools->Board->boards Manager menüsüne tıklıyoruz.
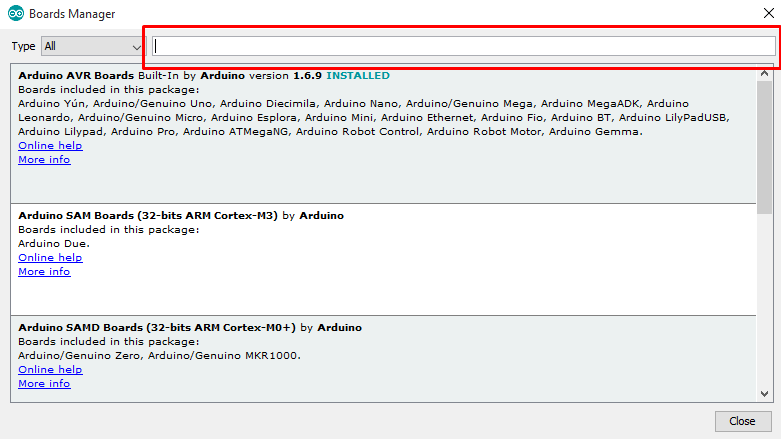
Kırmızı ile çevçeve içine alınan kısma 101 yazıyoruz ve enter’a basıyoruz. Çıkan menüde 101 ile ilgili kısma tıklayıp Install’a basıyoruz. 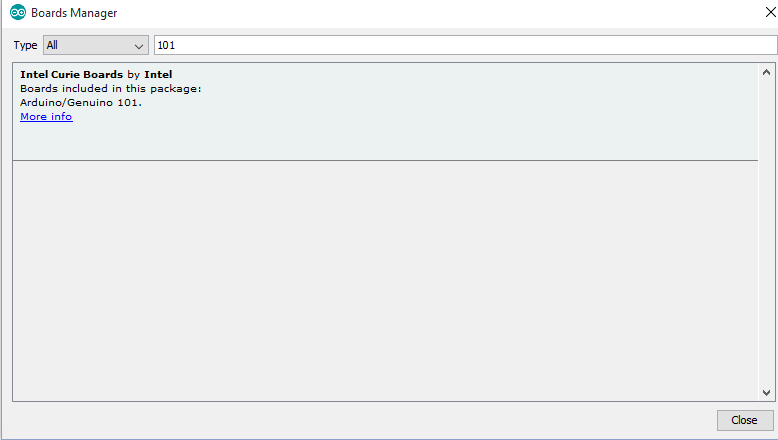
Yaklaşık 200mb’lık bir yüklemenin ardından Genuino101 kartımız kullanıma hazır. Tek yapmamız gereken Tools menüsünden Arduino/Genuino 101 kartını seçmek.
İLK UYGULAMA
Bu uygulama bir adımsayar olacak ve hazır koddan oluşacak. Uygulamamız Genuino 101 haricinde herhangi bir şeye ihtiyaç olmayacak. Adım saymak için Genuino 101 üzerindeki jiroskopu kullanacağız.
Genuino’muzu bilgisayara takıp, port ve board ayarını yaptıktan sonra aşağıdaki kodu Genuino’ya yüklüyoruz.
/*
   Copyright (c) 2015 Intel Corporation.  All rights reserved.

   This library is free software; you can redistribute it and/or
   modify it under the terms of the GNU Lesser General Public
   License as published by the Free Software Foundation; either
   version 2.1 of the License, or (at your option) any later version.

   This library is distributed in the hope that it will be useful,
   but WITHOUT ANY WARRANTY; without even the implied warranty of
   MERCHANTABILITY or FITNESS FOR A PARTICULAR PURPOSE.  See the GNU
   Lesser General Public License for more details.

   You should have received a copy of the GNU Lesser General Public
   License along with this library; if not, write to the Free Software
   Foundation, Inc., 51 Franklin Street, Fifth Floor, Boston, MA  02110-1301  USA

*/

/*
   This sketch example demonstrates how the BMI160 accelerometer on the
   Intel(R) Curie(TM) module can be used as a Step Counter (pedometer)
*/

#include "CurieIMU.h"

/* To get an interrupt notification for every step detected,
    set stepEventsEnabeled to true. Otherwise, the main loop will
    poll for the current step count.

   By design, the step counter does not immediately update on every step detected.
   Please refer to Section 2.7 of the BMI160 IMU SensorData Sheet
   for more information on this feature.
*/
const int ledPin = 13;

boolean stepEventsEnabeled = true;   // whether you're polling or using events
long lastStepCount = 0;              // step count on previous polling check
boolean blinkState = false;          // state of the LED

void setup() {
  Serial.begin(9600);
  // pinMode(13, OUTPUT);
  // intialize the sensor:
  CurieIMU.begin();
  // turn on step detection mode:
  CurieIMU.setStepDetectionMode(CURIE_IMU_STEP_MODE_NORMAL);
  // enable step counting:
  CurieIMU.setStepCountEnabled(true);

  if (stepEventsEnabeled) {
    // attach the eventCallback function as the
    // step event handler:
    CurieIMU.attachInterrupt(eventCallback);
    CurieIMU.interrupts(CURIE_IMU_STEP);  // turn on step detection

    Serial.println("IMU initialisation complete, waiting for events...");
  }
}

void loop() {
  /* Instead of using step detection event notifications,
     we can check the step count periodically */
  if (!stepEventsEnabeled) {
    updateStepCount();
  }
  digitalWrite(13, blinkState);
  blinkState = !blinkState;
  delay(1000);
}

static void updateStepCount() {
  // get the step count:
  int stepCount = CurieIMU.getStepCount();

  // if the step count has changed, print it:
  if (stepCount != lastStepCount) {
    Serial.print("Step count: ");
    Serial.println(stepCount);
    // save the current count for comparison next check:
    lastStepCount = stepCount;
  }
}

static void eventCallback(void) {
  if (CurieIMU.stepsDetected())
    updateStepCount();
}
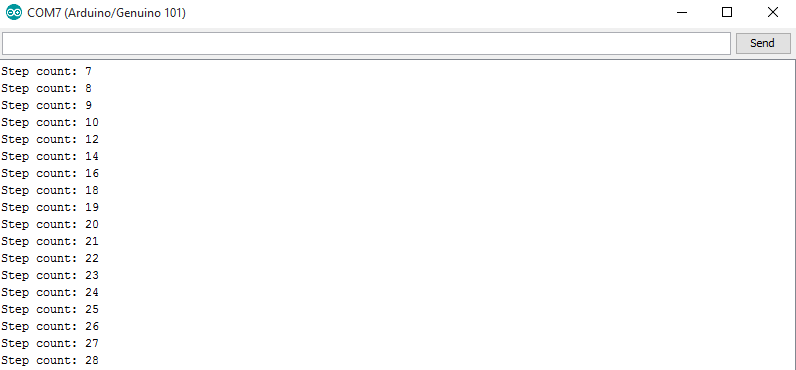
Kodumuzu attıktan sonra Serial Monitörü açıyoruz. Buradan sonra Genuinu’muzu salladıkça ekrandaki değerin arttığını göreceğiz.
NOT: Kartın CAD dosyasına ve PDF halindeki şematik dosyasına aşağıdan ulaşabilirsiniz